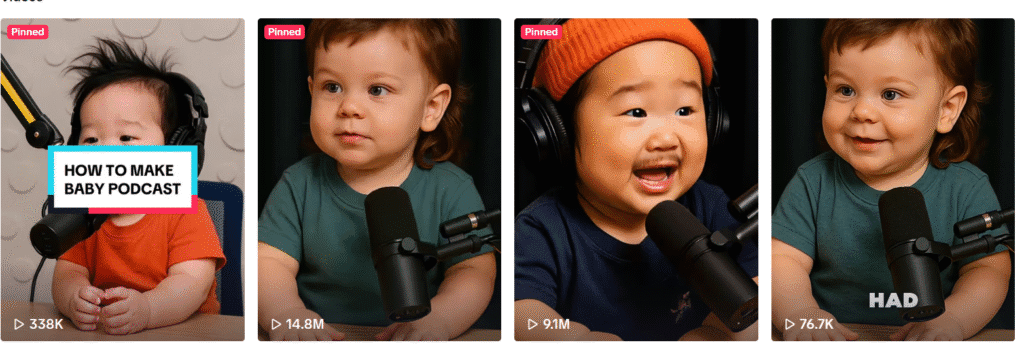
AI-generated baby podcast videos are blowing up all over social media, and it’s easy to see why. They’re funny, cute, and incredibly shareable.
In these videos, baby and animal characters engage in adult-style conversations, delivering witty commentary on everyday topics with exaggerated expressions and playful voices.
But here’s the secret — creating these viral videos is much easier than you might think.
In this guide, you’ll learn:
- How to write a compelling AI baby podcast
- How to generate realistic voiceovers
- How to design eye-catching baby and cat characters
- How to sync voiceovers with animations
- How to edit and finalize your video
By the end, you’ll have all the tools and techniques to create your own AI baby podcast video that’s ready to rack up views and engagement.
Let’s get started.
What is an AI Baby Podcast?
AI baby podcast videos are short, comedic clips that feature AI-generated baby and animal characters engaging in adult-style conversations.
These characters discuss everyday topics from a humorous, exaggerated perspective, making them both relatable and entertaining.
Why Are AI Baby Podcasts Trending?
- Hilarious and Adorable: The contrast between a baby’s voice discussing adult topics and a cat delivering witty, aloof responses creates instant comedic appeal.
- Easy to Share: The short, punchy format makes these videos perfect for social media platforms like TikTok, Instagram Reels, and YouTube Shorts.
- Highly Relatable: By using familiar baby and pet scenarios with an adult twist, these videos tap into universal experiences that audiences love.
You can watch the video tutorial here
Step 1: Writing the Script
A well-crafted script is the foundation of any engaging AI baby podcast video. The goal is to create a humorous, relatable conversation between a baby and a cat, using adult-style dialogue with a playful twist.
Why Scripting Is Important
- Sets the Tone: Establishes the comedic style and personality of each character.
- Drives Engagement: Keeps the conversation snappy and relatable to hold the viewer’s attention.
- Guides Animation and Voiceovers: Provides a clear framework for timing, expression, and animation cues.
How to Generate Script Ideas Using ChatGPT
ChatGPT is a powerful tool for brainstorming and drafting creative scripts. Here’s how to use it effectively:
- Open ChatGPT: Log in and start a new chat.
- Paste the Following Prompt:
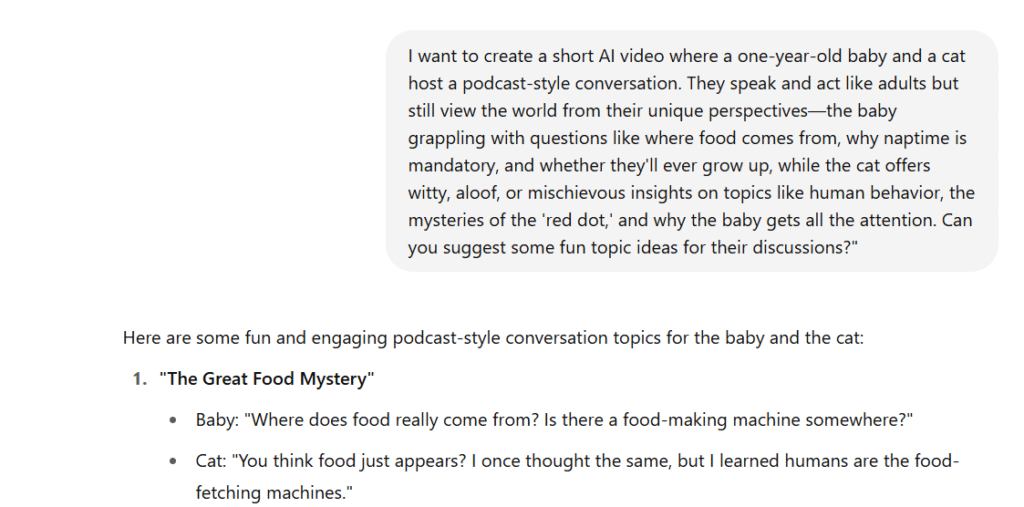
- “I want to create a short AI video where a one-year-old baby and a cat host a podcast-style conversation. They speak and act like adults but still view the world from their unique perspectives — the baby grappling with questions like where food comes from, why naptime is mandatory, and whether they’ll ever grow up, while the cat offers witty, aloof, or mischievous insights on topics like human behavior, the mysteries of the ‘red dot,’ and why the baby gets all the attention. Can you suggest some fun topic ideas for their discussions?”
Sample Script Ideas from ChatGPT:
ChatGPT will generate several topic ideas. Here are some potential topics to consider:
- “Why Do Babies Get All the Attention?” – The baby complains about always being the center of attention, while the cat sarcastically responds.
- “The Mystery of the Red Dot” – The cat tries to explain the elusive laser pointer to the baby.
- “Where Does Food Come From?” – The baby ponders the origin of food, and the cat gives a cynical, funny response.
Selecting and Modifying the Script:
- Choose the Most Engaging Topic: Pick a topic that is relatable and has comedic potential.
- Customize the Script: Adjust the dialogue to reflect the personality of the baby and the cat.
- Example: The baby might speak with wide-eyed curiosity, while the cat responds with dry, sarcastic humor.
- Keep It Short: Aim for a 1-minute script to keep the content snappy and easily shareable.
Example Script Based on “Where Does Food Come From?”
Baby: “So, where does food come from? Do we just, like, magically get it every day?”
Cat: “Yeah, kid. It’s called the ‘human delivery service.’ They open cans, they drop crumbs — it’s a buffet.”
Baby: “But what about the green stuff? The stuff they make me eat?”
Cat: “Oh, that’s called ‘vegetables.’ They’re punishment for being too cute.”
Step 2: Generating Voiceovers
Now that you have a catchy script ready, it’s time to bring your baby and cat characters to life with realistic voiceovers. Eleven Labs is a top choice for generating high-quality, AI-driven voiceovers that can be customized for tone and expression.
Why Use Eleven Labs for Voiceovers?
- Realistic Voices: Offers natural-sounding voices that can be adjusted for tone, pitch, and emotion.
- Custom Voice Profiles: Allows you to create distinct voices for the baby and the cat, adding personality to each character.
- Quick and Easy: Generates voiceovers in seconds, saving time and effort.
Getting Started with Eleven Labs
- Create an Account: Go to Eleven Labs and sign up for a free or paid account.
- Access the Voice Generator: Once logged in, navigate to the text-to-speech tool.
How to Generate the Baby’s Voiceover
- Select a Voice:
- Explore the available voices on the left panel.
- For the baby, choose a light, playful, and slightly exaggerated voice.
- Copy and Paste the Script:
- Copy the baby’s lines from the script you generated using ChatGPT.
- Paste the text into the input box.
- Adjust Voice Settings:
- Tone: Playful, innocent, and curious.
- Pitch: Slightly higher to convey a childlike tone.
- Emotion: Select “Happy” or “Excited” for a humorous effect.
- Generate Voiceover:
- Click the Generate button and wait for the audio to process.
- Preview the voiceover to ensure it aligns with the baby’s personality.
- If needed, adjust the tone and pitch to refine the delivery.
How to Generate the Cat’s Voiceover
- Select a Voice:
- For the cat, choose a deeper, slightly sarcastic voice that conveys a calm, aloof demeanor.
- Copy and Paste the Script:
- Copy the cat’s lines from the script.
- Paste them into the text box.
- Adjust Voice Settings:
- Tone: Sarcastic, laid-back, and slightly smug.
- Pitch: Medium to low, maintaining a relaxed, conversational style.
- Emotion: “Calm” or “Witty” to emphasize the cat’s detached, sarcastic delivery.
- Generate Voiceover:
- Hit the Generate button and listen to the output.
- Adjust the settings if necessary to perfect the timing and tone.
Step 3: Creating Baby and Cat Character Images Using Leonardo
Now that the voiceovers are ready, it’s time to design the visual components — the baby and cat characters. This step involves generating high-quality, photorealistic images that will serve as the visual anchors for your AI baby podcast. Leonardo is a great tool for creating these images with detailed prompts and customizable settings.
Why Use Leonardo for Image Generation?
- Photorealistic Quality: Produces high-resolution, 4K images with cinematic lighting.
- Customizable Prompts: Allows you to control character expressions, backgrounds, and settings.
- User-Friendly Interface: Simple to navigate, even for beginners.
Getting Started with Leonardo
- Create an Account: Visit Leonardo and sign up for an account.
- Access Image Models: Navigate to the “Image Generation” section and select the Phoenix 1.0 model for high-quality visuals.
- Set Image Dimensions: For podcast scenes, use square or landscape dimensions to ensure compatibility with video editing tools.
Generating the Baby Character Image
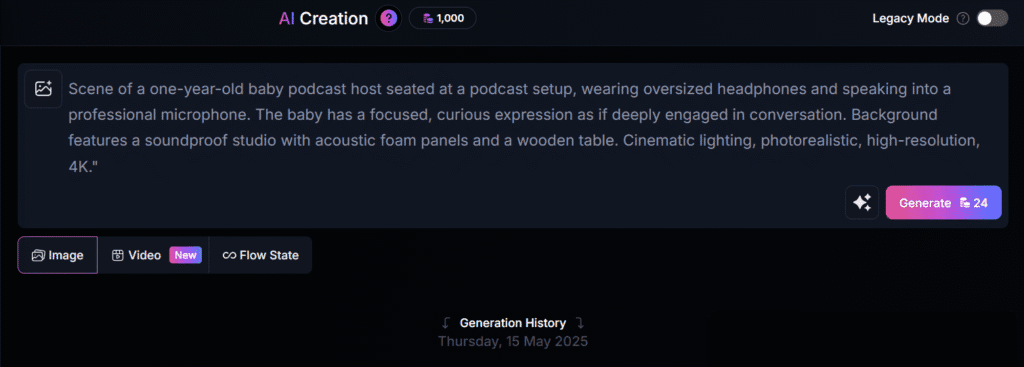
- Adjust Settings:
- Model: Phoenix 1.0
- Dimensions: 1080 x 1080 px (Square for easy editing)
- Prompt Enhance: Turn Off (Keeps the style consistent)
- Paste the Baby Image Prompt:
- Copy and paste the following prompt:
“Scene of a one-year-old baby podcast host seated at a podcast setup, wearing oversized headphones and speaking into a professional microphone. The baby has a focused, curious expression as if deeply engaged in conversation. Background features a soundproof studio with acoustic foam panels and a wooden table. Cinematic lighting, photorealistic, high-resolution, 4K.”
Generating the Cat Character Image
- Adjust Settings:
- Model: Phoenix 1.0
- Dimensions: 1080 x 1080 px
- Prompt Enhance: Turn Off
- Paste the Cat Image Prompt:
- Copy and paste the following prompt:
“Close up scene of a cat podcast guest seated at a podcast setup, wearing oversized headphones and speaking into a professional microphone. The cat has a slightly aloof, mischievous expression, looking directly at the camera as if delivering a witty remark. Background matches the baby setup with acoustic foam panels and a wooden table. Cinematic lighting, photorealistic, high-resolution, 4K”.

Generate Image:
- Click Generate and review the generated images.
- Select the most suitable image based on expression and positioning.
Save the Image:
- Download and name it Cat_Image.png to maintain organization.
Step 4: Animating and Lip Syncing
Now that you have your baby and cat character images ready, it’s time to bring them to life! The goal here is to animate the images and sync the lip movements with the voiceovers you created earlier. Hedra is an excellent tool for this, offering straightforward animation features and precise lip-syncing capabilities.
Why Use Hedra for Animation?
- Easy Lip Syncing: Automatically matches mouth movements to audio.
- Simple Workflow: Upload audio and images, then generate animated clips.
- Customizable Expressions: Adjust facial movements for more dynamic videos.
Getting Started with Hedra
- Sign Up: Visit Hedra and create a free account.
- Access the Video Section: Log in and navigate to the “Video Animation” option.
- Prepare Your Assets: Keep your voiceover files and character images in one folder for easy access.
Animating the Baby Character
- Upload the Baby Voiceover:
- Click on Upload Audio and select the Baby_VO.mp3 file.
- Wait for the audio to be processed.
- Upload the Baby Image:
- Click on Start Frame and upload Baby_Image.png.
- Adjust the image size and position to fit the frame properly.
- Customize Animation Settings:
- Lip Sync: Make sure the Lip Sync option is enabled.
- Expression: Choose a Curious/Happy expression to match the baby’s tone.
- Duration: Set the animation length to match the audio file.
- Generate the Animation:
- Click Generate, and wait for the output.
- Review the video to ensure the lips sync correctly with the voiceover.
- Save the file as Baby_Animated.mp4.
Animating the Cat Character
- Upload the Cat Voiceover:
- Click on Upload Audio and select the Cat_VO.mp3 file.
- Upload the Cat Image:
- Click on Start Frame and upload Cat_Image.png.
- Adjust the image as needed.
- Customize Animation Settings:
- Lip Sync: Enable this feature.
- Expression: Choose a Sarcastic/Smug look to fit the cat’s tone.
- Duration: Match the audio length.
- Generate the Animation:
- Click Generate, and wait for processing.
- Save the file as Cat_Animated.mp4.
Pro Tips for Lip Sync and Animation:
- Expression Accuracy: Make sure the facial expressions align with the character’s tone.
- Audio Syncing: If the lip movements seem off, adjust the audio timing and regenerate.
- Frame Rate: Use a higher frame rate (like 30 FPS) for smoother animation.
Organizing Animated Clips:
- Store both animated videos in a folder named Animated_Clips.
- Clearly label each file as Baby_Animated.mp4 and Cat_Animated.mp4 for quick access during editing.
Now that you have the animated clips of both characters, it’s time to piece everything together and add finishing touches. In the next section, we’ll cover how to edit and finalize your AI baby podcast video using CapCut.
Step 5: Editing and Finalizing the Video
Now that you have the animated clips of the baby and cat characters, it’s time to bring everything together into a cohesive and engaging video. CapCut is a user-friendly editing tool that provides all the essential features for arranging clips, adding subtitles, and applying effects.
Why Use CapCut for Editing?
- User-Friendly Interface: Easy drag-and-drop editing.
- Subtitles and Text Effects: Perfect for enhancing comedic timing.
- Audio Syncing: Allows precise alignment of audio and visuals.
- Free to Use: Accessible for beginners without additional costs.
Getting Started with CapCut
- Download and Install CapCut:
- Visit CapCut and download the desktop or mobile version.
- Open a new project and import your assets:
- Baby_Animated.mp4
- Cat_Animated.mp4
- Background music (optional)
Step 1: Import and Arrange Clips
- Import Files:
- Click on the Media Library tab and upload the animated clips and any background music.
- Drag Clips to Timeline:
- Start with Baby_Animated.mp4 and place it on the timeline.
- Add Cat_Animated.mp4 immediately after, creating a back-and-forth conversation flow.
- Adjust Clip Lengths:
- Trim each clip to align with the dialogue and maintain a snappy, fast-paced rhythm.
- Ensure that each clip transitions smoothly, maintaining natural timing for comedic effect.
Step 2: Add Subtitles
Subtitles are crucial for maintaining viewer engagement, especially when dealing with AI-generated voices.
- Import Background Music:
- Drag and drop the music file onto the audio track.
- Adjust Volume Levels:
- Lower the background music to 30% volume to prevent it from overpowering the dialogue.
- Apply fade-in and fade-out effects to keep transitions smooth.
- Add Sound Effects (Optional):
- Insert playful sound effects (e.g., pop, boing, meow) to emphasize comedic moments.
- Play Through the Entire Video: Watch the full video to ensure the pacing feels natural and that the comedic timing lands effectively.
- Adjust Timing as Needed: If any clips feel too long or too short, trim them to maintain flow and keep the viewer’s attention.
Step 3: Export the Video
- Click on Export:
- Set the resolution to 1080p HD for optimal quality.
- Choose a frame rate of 30 FPS for smooth playback.
- Name the file AI_Baby_Podcast_Final.mp4 for easy identification.
- Optimize File Size:
- If the video is intended for social media, adjust the export settings to keep the file size manageable without sacrificing quality.
Now that your video is complete, it’s time to get it in front of as many eyes as possible.
FAQs: How to Create a Viral AI Baby Podcast Video
- What is an AI baby podcast video?
- It’s a short, comedic video featuring AI-generated baby and animal characters having adult-style conversations using text-to-speech and animation tools.
- What tools do I need to create an AI baby podcast video?
- You’ll need ChatGPT for scripting, Eleven Labs for voiceovers, Leonardo for character images, Hedra for animation, and CapCut for editing.
- How long should the AI baby podcast video be?
- Aim for 30 to 60 seconds to keep it engaging and easily shareable on platforms like TikTok, YouTube Shorts, and Instagram Reels.
- Can I use other AI tools besides the ones mentioned?
- Yes, you can use alternatives like Kling AI for animation and lip sync.
- How can I make my AI baby podcast video go viral?
- Focus on relatable, humorous topics, use catchy captions, and post consistently on trending platforms with relevant hashtags.